I was working on some home project the other day and I needed some images for a simple 2d game. Once I had made all the graphics in Photoshop I had to save each one to a separate file, then flatten each of those files, copy and paste each one back in to the original, then align the flattened copy with its corresponding part in the original and then look in the info palette and write down its coordinates. Just 10 images ended up taking 45 mins.
I thought there had to be a better way. Photoshop has had the ability to be scripted externally for a while now but it only actually got truly useful as of version 8.0 or Photoshop CS. I looked into it and the result is this script that will automatically cut out all my images and save the relevant information to a file ready for use in a game.
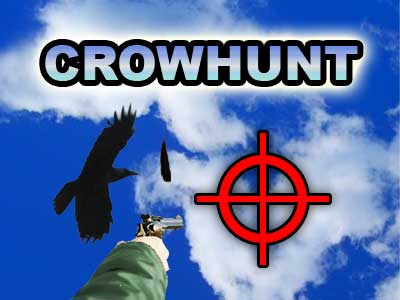
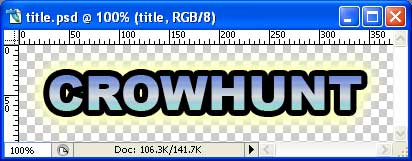
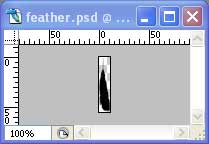
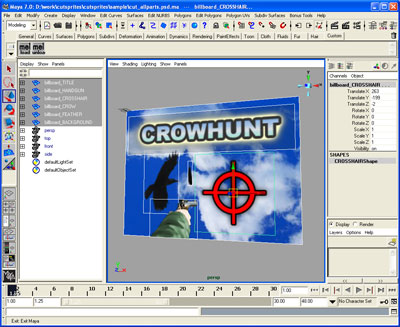
Imagine you are going to make a simple 2d game called Crowhunt. You need the following graphics. A crow, a feather, a crosshair, a hand + gun, the title graphics and a background image.
The script I wrote works by going down the first level of layers and groups in Photoshop and turning each one into a separate file cropped to the size of that layer.
It saves the images by the name of that layer or group.
One other feature I needed was the ability to mark a particular spot in an image as a reference point, usually as a rotation point. Before I would put the Photoshop cursor over that point, look at the info palette and write it down but again, that was a pain in the ass so instead I now create a group, name the group what I want the result saved as, put the layer with the image I want inside the group and then create a new layer inside that group with the name "rotpoint". In that layer I put a single pixel using the pencil tool, any color. The script will save the location of that pixel for me. You can see to the left in my example layer palette the handgun group has a "rotpoint" layer and if you look closely above you can see the 1 pixel yellow dot in the sleeve of the arm. That pixel will not appear in the final file, it just marks the rotation spot.
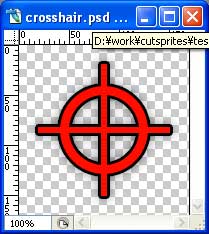
I also did not want to have to flatten anything and I wanted to be able to use Photoshop's layer effects. If you are a Photoshop user you might notice on the layers on the left the crosshair is a vector based layer and the title is a text based layer and the both have layer effects applied. The script will keep them as you see them there.
Once it's done I save the Photoshop file and run the script. When it's done I'll have one Photoshop file for each layer or group I had in the original, trimmed to its minimum size.
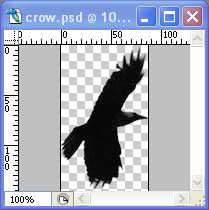
Here are the images as cut from the sample above
| ||||||||||
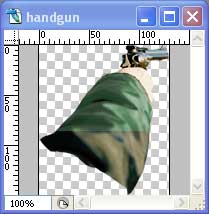

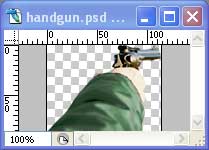
The first thing to notice is the handgun has more graphics than it appeared to originally. When you paste something into a layer in Photoshop, Photoshop by default keeps all of it. Later you might decide to move that layer and if you dragged it further into the image you'd be glad that's the way it works. In my case though I just wanted exactly what was on the screen so I did a "Select−>All" and an "Image−>Crop". Because I had all selected it doesn't appear the crop did anything but it actually cropped the stuff from any layer that had parts outside the image. I ran the script again and this time the handgun came out as I needed it.
The script also wrote out this file.
#define CUT_ALLPARTS \
SPRITEINFO(0,HANDGUN,"handgun.psd",120,285,121,286,70,214,184,300) \
SPRITEINFO(1,CROSSHAIR,"crosshair.psd",178,114,348,284,178,114,348,284) \
SPRITEINFO(2,TITLE,"title.psd",15,15,389,112,15,15,389,112) \
SPRITEINFO(3,CROW,"crow.psd",52,101,139,247,52,101,139,247) \
SPRITEINFO(4,FEATHER,"feather.psd",160,128,171,183,160,128,171,183) \
SPRITEINFO(5,BACKGROUND,"background.psd",0,0,400,300,0,0,400,300) \
The values in the macros are as follows. The first number is an index if you want one, followed by an ID and then a filename. The next 4 values are the bounds of the rotpoint or the bounds of the image if no rotpoint existed. The second set are the bounds of the image. The format of those are left, top, right, bottom where right and bottom are 1 pixel off the right and bottom. In other words, the width of an image is (right − left) not (right − left + 1).
To use that info in a game in C++ you might do something like this
#undef SPRITEINFO
#include "cut_allparts.psd.info.cpp"

#undef SPRITEINFO

#define SPRITEINFO(ndx,id,fname,rotleft,rottop,rotright,rotbtm,left,top,right,btm) \
  IMAGEID_ ## id,

enum ImageIds
{
    CUT_ALLPARTS

    IMAGEID_last,
};

struct ImageInfo
{
    const char* filename;
   int xPos;
   int yPos;
   int width;
   int height;
   int centerX;
   int centerY;

};

#undef SPRITEINFO
#define SPRITEINFO(                           \
            id,                               \
            label,                            \
            filename,                         \
            centerLeft,                       \
            centerTop,                        \
            centerRight,                      \
            centerBottom,                     \
            cutLeft,                          \
            cutTop,                           \
            cutRight,                         \
            cutBottom)                        \
    { _T("media/images/") _T(filename),       \
    (centerRight + centerLeft) / 2,           \
    (centerBottom + centerTop) / 2,           \
    cutRight - cutLeft,                       \
    cutBottom - cutTop,                       \
    (centerRight + centerLeft) / 2 - cutLeft, \
    (centerBottom + centerTop) / 2 - cutTop,  \
    },

ImageInfo ImageTable[] =
{
   CUT_ALLPARTS
};
Unfortunately, I know very few engines that can directly load Photoshop files. For my purposes I needed targa (.TGA) files. While it *should* be possible to get Photoshop to save targas the problem is I wanted alpha channels as well and I wanted them to have alpha that included the layer effects from Photoshop.
That's not trivial in Photoshop. The steps are something like:
- create a new empty layer
- merge the visible layers. This will remove the effects and bake them into the image.
- select the transparency of the layer
- set the background color to black and the foreground color to white
- go to the channel palette and create a new channel
- fill the selection with white
You'd now have the correct alpha. Unfortunately those steps are not easily accessible from scripting in Photoshop. While it would be possible, under the current script engine it requires using actions. I tried it once, Photoshop comes with a "ScriptListener" which will save all everything you do in Photoshop to a script which you can then edit later. I tried it but it was not easy to understand and as I already had a different solution that worked I decided to use that instead.
My different solution is a tool that is part of the libraries I use for games development written back in 1995 that will load Photoshop files and save them as targas (among other things). Photoshop by default saves a preview image inside its files that is the result off all the layers together as well as the transparency so converting that to a targa through my old tools gives me exactly what I need.
| ||||||||
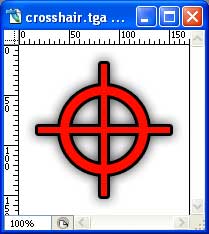
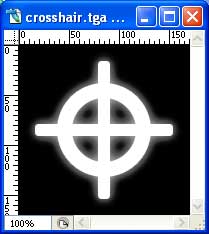
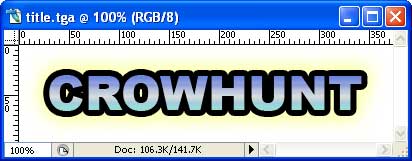
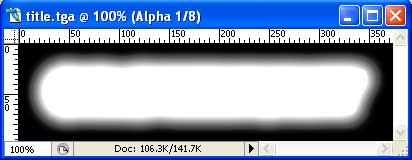
Here you can see the result. You can see the glow around the title and the shadow and border around the crosshair as well as the correct alpha for each of them.
To use the Photoshop cutsprite script manually you'll need at least Photoshop CS. Make a Photoshop file following the rules described above with each image in a layer or group and give a name to each layer or group. Save it. Then, Pick File−>Scripts−>Browse... from the menus and choose openandcutsprites.jsx. An open file dialog will appear. Select the file you saved. The script will then follow these steps
- load the file
- separate each layer and group to a new file and save it to the same folder as the original based on the name of the layer or group.
- write out a <filename>.info.cpp file with in info about the sizes of the images.
- close the original image.
Warning: There is NO check for overwriting files so be careful!
I also wrote a script that will go through a tree of folders finding any Photoshop file that begins with "cut_" and will cut that file automatically. To run that you'll need to install ActivePerl (free). I could have written the script in VBScript or JScript but I'm far more comfortable with Perl so I did it there. Perl supports Microsoft's "Windows Scripting Host" which is basically a way for any language to be used as a scripting language for Windows. Microsoft supplies VBScript and JScript. There is also PerlScript and PythonScript.
The script will start from the current folder and look in every subfolder for any file that starts with "cut_" and ends in ".psd". If it sees such a file it will tell Photoshop to run the script above on that file. The easiest way to use it is just to copy it and the rest of the files to the base folder of whatever project you are working on. Double click on cutallsprites.wsf and it should run. Oh, before you do that you should open a command line and type
cscript //H:CScript
capitalization is important! This will set Windows Script Host to default to using the command line version.
Also included is another Perl program called processPSDtoTGA.pl. This program will walk all the folders from the current folder down and any ".PSD" file it finds it will create a corresponding ".TGA" file. Like the previous tool it's easiest if you just copy this and all the other files to the base folder of your current project and double click it to run it.
I hope you find this useful. The code is released under a BSD license so feel free to modify any of these to suit your own needs. You can download it from the link below
cutsprites.1.4.zip (666k)
Maya Support
I added a Maya Ascii scene file generator to the cutallsprites.wsf script so once the Photoshop file has been cut you'll find a ".ma" maya ascii file there. Load it up in Maya and it should reproduce the original setup along with points of origin in the correct spots.
Often many 3d engines have limited 2d abilities. They'll have a full on animated textures, materials, translation, rotation and scale for 3d but nothing for 2d. Well, just setup an orthographic camera and use your 3d engine for your 2d. Much simpler than writing a completely new system.
Version History:
- 1.4 - 2006/03/15
- Added "ig_" ignore layer support. Layers that start with the letters "ig_" will be ignored. This is especially useful for layers with guides or safezones or other things
- Changed code to turn on all layers that are not one of the various special layers (ie, "ig_..", "cropsize", "bg_color", "rotpoint", etc.)
The point is many times artists and myself turn off layers to do work but forget to turn them back on before saving in which case these scripts will fail. I could have made it skip layers that are turned off but in my experience it's far more common that you want all the layers. If there is a layer you don't want rename it to "ig_...".
- Changed cutallsprites.wsf to check data of maya file vs photoshop file. If the maya file is newer than I assume the file does not have to be re-cut and I can skip it. This means re-running cutallsprites.wsf will be fast and efficient and do nothing if nothing needs to be done or only cut those files that have been updated.
- 1.3 - 2006/03/10
- Added "bg_color" layer support. Layers with the name "bg_color" will be turned on if they exist. You can put them inside groups to make them apply to only one group and you can have more than 1.
What's the point?
Well, for many 3D hardware if you want to display a colored texture with transparency you basically need to draw in full color in the color layer and just set the alpha for transparency. In other words, lets say you wanted to have the word "Start" in red. If you just draw it in red with no "bg_color" layer you will get a texture with red pixels on a white background and the correct alpha channel . The problem is the pixels that are anti-aliased at the edges already have white mixed in them. If you use this on some 3D hardware your word will have a slighty white border. To fix this create a layer, name it "bg_color" and fill it with red. Since it's probably confusing hide the layer. Now run the script and you'll get a completely red texture but with the correct alpha. This will look correct on hardware that had issue with the previous texture. See the included sample "cut_bgexample.psd".
- Added support for global "cropsize" layers. Now you can put multiple layers and crop them all to the same size. See the included sample "cut_bgexample.psd".
- Added forcing to a even number of pixels. This should probably be an option since your tools might not have an even pixel limit but 1 extra pixels is not going to bother most people so I decided not to add an option. If you don't like it edit the code.
- Added "bg_color" layer support. Layers with the name "bg_color" will be turned on if they exist. You can put them inside groups to make them apply to only one group and you can have more than 1.
- 1.2 - 2006/03/04
- Added maya ascii scene generator
- Moved targa generation to photoshop script
- Added black blending / premult for alpha if targa
- 1.1 - 2006/02/17
- Similar to the "rotpoint" layer, added a check for "cropsize" inside a group. If found the group will be cropped to the size of the "cropsize" layer.
- 1.0 - 2006/02/16
- Released