You'd think this would be obvious but it's surprising how often I run into
source code that doesn't use self documenting names. Many developers will use
the shortest names possible. I'm sure plenty of my old code is this way. Some
of you may have asthetic reasons for short names. I'd argue asthetics should
come after logic and practicality. You're goal should be to write code fast
with as few complications and bugs as possible. Code that is easy for others to
understand so that they also don't get confused and run into bugs.
Let me attempt to point out some examples of self documenting names and
non−self documenting names and the problems they cause.
void DrawLine(float x, float y, unsigned int color); // <- bad
This looks like a straight forward function except what is color? Is it in the
format 0xAARRGGBB or 0xRRGGBBAA or 0xAABBGGRR or maybe something else entirely.
Any time wasted looking up what it's supposed to be is one more reason you're
going to be sitting at your desk late at night instead of out and about.
void DrawLine(float x, float y, unsigned int colorRGBA); // <- better.
Now it's very clear. Color is 0xRRGGBBAA format so 0xFF0000FF would give you
100% red.
Someone might suggest instead of the type being unsigned int, maybe it should
be custom type. That's fine, just name the type something clear. typedef unsigned int ColorRGBA not typedef unsigned int Color
void DrawLine(float xPixels, float yPixels, unsigned int colorRGBA); // <- best
Ah ha!, x and y are in pixels.
How about this one.
void copy(thing* a, thing* b); // <- bad.
does this copy a−>b or b<−a?
void copy(thing* a, const thing* b); // <- better.
That helped beacuse obviously we can't copy a−>b if b is const but
assume the copy function is 100 lines long. Maybe it's copying an array of
something and inside there's something like copyarray(a.m_arrayData, b.m_arrayData). Again, looking at that single line I'd have to go reference the definition
of a and b to know which side is the source and which is the dest.
This one obviously we copy src−>dst, no parsing the code required. And
lines like this copyarray(dst.m_arrayData, src.m_arrayData) inside copy will now be readable without having to reference anything else.
Here's some others:
float rotationAmount; // <- bad
float rotationAmountInRadians; // <- better, we know they are radians
float rotationAmountInRadiansPerSecond; // <- best, we know 100% what it is

vector3::velocity; // <- bad
vector3::velocityInMeters; // <- better
vector3::velocityInMetersPerSecond; // <- best

void Update(float elapsedTime); // <- bad
void Update(float elapsedTimeInSeconds); // <- good, ah, it's in seconds.
I heard one programmer object that time wasn't always in seconds because
sometimes (bullet time) he slowed down the game. That's pretty much irrelevant
though, in his game all calculations are done as though the time passed in is
in seconds. It's good to know the time is in seconds, not in frames or some
other unit. Name it!
Note that it's okay to shorten or abbreviate. Just be consistent MPerSec or
InSec or use a prefix secsElapsed, mpersecVelocity. A very good article that
also deals with similar issues this Joel's "Making Wrong Code Look Wrong"
These ideas are not about being a code nazi. They are about being efficient and
avoiding bugs. Every one of these has bitten me before. I've had to dig through
levels of library code to find out which is source and which is dest in a
function. I've spent hours trying to figure out why something did not appear on
screen because I was passing radians when the function in question wanted
degrees but because the docs just said "rotation" and because the argument was
just called "rotation" it didn't even cross my mind until hours of tracking
down the issue.
Another common excuse some programmer will bring up is because their editor
shows the help or function signatures or has other kinds of helpful features
that they don't need to follow these guidelines. That might be true if you're a
one man team. On anything larger other programmers are likely to be using
different editors which may or may not bring up the same help. I know that in
my current project I use both Visual Studio and Visual Slickedit and neither
bring up all our help.
So, help out your fellow programmers and automatically document your code by
choosing variable names that make the code easier to understand. If I had
followed these rules I'd have had to work less, gone home to be with my
girlfriend, or moved on to the next feature instead of wasting time figuring
out things or tracking down bugs that could be avoided by simply naming things
better.
Python is one of the new weapons of choice at one of my current contracts.
I'm a big believer in removing as many chances for error in a project as
possible. That means for example where as some teams will have their designers
edit an Excel spreadsheet .xls file and then require them to also export to a
.csv file for the game, I'd prefer if they just save to .xml at all times.
They lose no features because Excel will save all the data, formatting,
formulas
etc to XML and Windows will even directly open the .xml files to Excel when
double clicked so as far as the user is concerned nothing changes. In fact once
they create the file Excel will load and save to .XML so there is no need to
remember to save as .XML, it just happens. Automated things like that mean no
errors.
When using CSV files there is always the issue that the designer may or may not
have remembered to export so they change a value, save the file and forgetting
to export they spend a bunch of time trying to figure out why their changes are
not showing up in the game. Or, worse, when you save AS CSV in Excel, excel
then
defaults to saving that file in CSV mode. So, if the designer makes any changes
after that and forgets to resave the file specifically in .xls mode then all
their changes will be lost. Sure they can reload the .csv file but any
formulas,
formatting, colors, comments etc will all be lost.
If instead they use XML files then they don't have to remember the step of
saving to CVS. They don't have to worry about saving back to XLS as well and
they never have to worry about losing data since that issue will never come up.
I know some teams that write Excel macros to do this. That's a huge waste of
time. Those macros generally have to be propogated to all their Excel files.
Those macros often have to be tweaked for different versions of Excel. It
becomes even more of a pain at localization time because the developers don't
usually control the machines of the people editing the files in other countries
and macros etc are often disabled. I've seen no end of problems dealing with
Excel files that had macros in them so no, macros are not the solution.
It's much simpler just to parse the XML. As you can see below it's very little
code. You can easily add it to your tool pipeline or, looking at the example
for
reference, just make your game load and parse the XML file directly, at least
during development.
I tried Pythonifying the code so it's pretty simple to use. The following are a
few simple examples
xl = excelreader.ParseExcelXMLFile("someExcelFile.xml")

print "Cell B4 in first sheet = ", xl[0][4][2]
print "Cell G5 in first sheet = ", xl[0]['G5']
print "names of sheets        = ", xl.keys()
print "Cell A7 in Sheet1      = ", xl['Sheet1'][7][1] # assumes there is a sheet called "Sheet1"
print "all cells in all sheets"
for worksheet in xl:
    for row in worksheet.keys():
       for column in row.keys():
          print row, column, worksheet[row][column]
The library also pulls out style info which is useful if you want to know the
colors (say for generating corresponding materials in Maya) or the font names
and sizes (say for auto−generated localized textures)
print xl[0].GetCellStyle(7,2)  # style info for cell B7 in first sheet
print xl[0].GetCellStyle('D3') # style info for cell D4 in first sheet
I'm working on some game libraries, tools and utilties. The first thing I'm
posting is some debugging libraries. Stuff I use while making a game,
specifically a console game.
There's 4 major parts to it
a debug console.
This is just the ability to do a printf to the display. Most development systems let you print to a terminal or inside the debugger. The problem with those systems is the artist, the desginer or myself is not looking at the debugger. We are looking at the game. Therefore, important messages need to be displayed in the game or they will go un-noticed.
On top of that, games generally erase and re-draw the entire screen every frame so some method of re-drawing the messages needs to be created. Without a system like this that process can get quite cumbersome.
The systmem supports output in different colors as well as flashing output to make very important messages stand out.
print to the debug terminal
Most dev systems have an OutputDebugString type of way to get a message to the terminal. These are just wrappers that provide more functionalty like printf and so I have one place to fix if I switch engines.
print to the screen
Again, most systems have a DrawText function that will draw a string. I just always need wrappers so I can do printf style formatting and again, I want it in one place so if I switch engines I don't have to learn a new api or change other code to use a new api.
debug menus
This is the biggest part. These are menus, controllable from the joypad/controller that you can pull up in the game to inspect and or edit things in realtime.
For all of these my #1 goal was to make something easy to use. So for
example there is no need to init any of them. While you can set a few
parameters they will work without any settings. The menus and the console only
require 1 function to be called for them to operate, etc...
The menus in particular have been designed to be easy to add items to with
lots of default handlers. In one line you can add menus that edit bools, ints,
floats, either directly or can edit them through functions or even member
functions. Menus that call callbacks in C style, CPP function object style and
member function style.
They handle enums, although you need to supply a value−label table. They
can also handle STL collections and display them as menu items.
Some other features.
They handle menus that have too many items to fit on the screen and will let the user scroll through them.
They support non-uniform height menu items.
They handle the menus cascacding past the right edge of the screen
They are platform independent.
There is a file debugplatform.h that defines a few functions. You create your own debugplatform.cpp and provide those few stubbs and the all these debug systems will start working.
They are semi draw order independent.
Originally when a submenu cascaded into the right edge of the screen I would just move it flush right. I assumed since a menu's parent was drawn before itself I thought the children would draw over their parents and therefore be usable. Unfortunately when I tried it out it became clear that in the engine I was using it in, draw order was not preserved. Text draws and rectangle draws were queued separately. So, I changed the menus to figure out what the right most edge they need is and then I push everything else to the left. Now the draw order doesn't matter as much since nothing ever overlaps. Rectangles still need to be either drawn before text or with a lower Z order but that's not the responsibility of these routines.
Anyway, I have no idea if anyone other than me will find these useful. I know
that many teams are using systems that have other ways to accomplish this kind
of thing. For me though I have found them useful and so have the teams I've
been on. It's my hope that now that I have my own I'll never have to write them
again.
If you are interested you can find them on sourceforge here. They are released under the NewBSD license so use them how ever you want.
There are not a lot of docs yet but the code is pretty well commented. There's
also a file called debugmenus_examples.cpp that shows how to setup a
bunch of different kinds of menus. And, there's a Win32 sample as well to
actually see them run. To keep it simple the sample uses the keyboard to
emulate a joypad. The cursor keys are the DPAD. The space bar is the Action
button if you want to call it that. Think X on the PS3 or A on the 360.
Backspace is the cancel button.
While I was working on Locoroco my last task was to create the Loco House and
Loco Editor mini−games. They are basically mini level editors.
Locoroco the game uses a signal system based system for the majority of its
setups. What that means is using very simple objects that send and or receive
signals the designers then connect them in creative ways to make the game. A
simple example is you might have a switch that has two output signals
"out_pressed" and "out_released". You might
also have a door that has two input signals "in_open" in
"in_close". If you connect switch.out_pressed to
door.in_open then pressing the switch will open the door.
Let's say the designers ask for a new type of door that after it has been
opened, closes after 5 seconds. Instead of actually making a new kind of door
or adding options to the existing door we just given them a timer object that
when it receives a signal sends another signal a settable amount of time later.
As you can see above, when the switch is pressed it will tell the door to open
but at the same time it will tell a 5 second timer to start. 5 seconds later
the timer will tell the door to close.
Using small objects like this most setups in the game were created. For each
feature a designer wants we figure out what kind of simple objects we could
give them to make that possible. In this way we get lots of flexibility. In the
original Tokyo Game Show version from September 2005 even the scales that tell
you "15 LocoRoco Required" were made this way. Using 5 objects of
only 3 types
Type 1: An object that places an animation when it receives a signal "in_start" and loops on another animation until it receives the signal "in_stop" and then plays a final animation.
One was set to play the sign that says "15 LocoRoco Required". The start animation has it appear, the loop animation has it floating, the final animation has it disappear.
Another was set to play an animation the lowers the scale. The start animation has it just sitting there. The next animation plays it moving down.
Yet another was set to play an animation that opens the door to the bonus area.
Type 2: An invisible area object the counts locoroco to a settable number. In this case 15. It sends 3 types of signals
no locoroco inside the area to some locoroco inside the area sends "out_some"
some locoroco inside the area to the required number or more sends "out_full"
some locoroco inside the area to no locoroco inside the area sends "out_empty"
Type 3: A object that plays a sound when it gets a signal.
Can you figure out how to connect them to get it work?
Anyway, originally I wanted to put the ability to use some of those features
into the Loco Editor for players to use. I actually put that feature into the
Loco Editor but I could tell the director had kind of forgotten about it. Even
though I had showed it to him working he was way too busy to give it any time
to fully plan out and after a couple of months of him never mentioning it again
I could tell he had forgotten about it.
Since I knew we were short on time I figured if I brought it up he'd tell
me flat out "there's no time so let's cut it". So, instead I
decided just not to ask. I also felt if I left it in as is the testers would
find it and again I'd be told "take it out" so I decided
"You know what? I'm going to hide it behind a code and just not say
anything".
So, in the shipping LocoRoco there is the ability to edit signals in your own
levels. Here's how you do it.
First, get yourself to the Loco Editor. From the Menu screen pick Mini Games
and then pick the last game
Once in go to the System Menu by pressing Square
To enter a code you have to hold L+R (the top buttons). The codes work like this
A = Triangle (because A looks like a triangle)
T = Triangle
O = Circle (because an O is a circle)
C = Circle
S = Square
X = X
L = Left on d-pad
R = Right on d-pad
U = Up on d-pad
D = Down on d-pad
While holding L+R enter the code RADCATLOCOROCO. If you enter it correctly you
should here a small sound. Exit the System Menu and go into the Parts Menu.
Scroll to the end and you should see these parts
You can place them like normal parts. To connect signals, go back to the Parts
Screen but this time press Select. You'll go back to editing the level but
this time you're editing signals.
To connect a signal click an out circle then move your pointer to an in circle
and click again (see below for the bad news). To disconnect a signal click
anywhere along the arrow. It will disconnect and attach itself to your pointer.
Connect it to something else or press X to delete it.
The parts are as follows:
Signal Part Table
#
Part
In
Out
Description
241
Switch
X
Sends an out signal the first time a locoroco hits it.
242
Short Fruit
X
X
Grows when it receives a signal, sends one when eaten
243
Tall Fruit
X
X
Grows when it receives a signal, sends one when eaten
244
Tall Invisible Fruit
X
X
Insivible fruit, Appears when it receives a signal, sends one when eaten
245
Short Invisible Fruit
X
X
Insivible fruit, Appears when it receives a signal, sends one when eaten
246
Two
X
X
Sends a signal after it receive 2 signals
247
Bug
X
Sends a signal when taken
248
Timer 1
X
X
After receiving a signal waits 1/6 of a second then sends a signal
249
Timer 2
X
X
After receiving a signal waits 1/2 of a second then sends a signal
250
Timer 3
X
X
After receiving a signal waits 1 second then sends a signal
251
CW Door
X
X
After receiving a signal turns 90 degrees clockwise then sends a signal
252
CCW Door
X
X
After receiving a signal turns 90 degrees counter clockwise then sends a signal
253
Shrinker
X
X
After receiving a signal turns shrinks then sends a signal
254
Grower
X
X
After receiving a signal turns grows then sends a signal
That's the good news now for some of the not so good news.
One problem was that because this was secret I couldn't get input from the entire team about what kinds of objects we should put into to it. What I had suggested originally when I told them how the signal editing worked was that they should make almost ALL the parts work with signals. Parts like the letters A-Z could send a signal when they are touched, parts like the wind could take a signal to turn them on or off, etc... Unfortunately they didn't do that so none of the 156 original parts have been connected to signals.
Another was that we were out of memory in the level editor. 156 parts available take a lot of memory. That meant there wasn't a lot of room for fancy parts nor was there room for icons. That's why there are only 14 parts I was able to add.
Yet another issue was trying not to get caught. The tools that build the data would print status messages about what they built so I had to fix them so they wouldn't print those messages for my secret parts lest someone see them and start asking questions.
And, finally I had to find a way to hide the codes so the testers wouldn't find them. They actually found a clue once. The code used to be entered on the Parts Screen if you held L+R. While the code was being entered the other buttons didn't work. They flagged that as a bug "buttons must work even with L+R pressed". For a moment I thought maybe I could just say "by design" but then I thought if I didn't fix that the lead programmer would fix it and in doing so he'd see the secret code part of the program. So, I moved the place you enter the codes somewhere else and hoped they wouldn't notice.
The biggest issue though is that none of it was ever tested and so there are
bugs.
Bug #1:
You only get 1 of part #254. Enter the code again to get another.
Bug #2: (Japanese, Korean, Chinese and European versions only)
You can get an arrow from any part and connect a signal to any part even of
that part is not suppose to support signals. (e.g., part #001) They
won't actually do anything.
Bug #3: (Japanese, Korean, Chinese and European versions only)
You can only connect 20 signals total. I suppose that wouldn't be a bug if
I didn't tell you about it but you should have been able to connect 500
like the USA version
Bug #4: (USA version only)
You can NOT pull out signals from parts 241 and 247. That's a BIG DEAL
because, you can't actually use any of the other parts unless they get a
signal and you can't get any parts to send signals to start it all off
except from parts 241 and 247. Fortunately there is a workaround. It's not
pretty but here it is.
unzip them and copy them to the correct place on your PSP memory stick. These
levels have a bunch of parts 241 and 247 already in them. Here's the deal.
You cannot NOT pull out new signals from those parts. What you can do is select
the signals already coming out of them and connect them to other parts.
So, here you have it.
While I'm at it here are a few more codes you can enter in the same way.
LOTSOLOCOROCOS
Adds 5 locorocos of each color to your Loco House.
ALLLOCOROCOS
gives you all the parts
ATTACLOCOROCOS
lets you use the 12 Special Loco Editor parts in Loco House (like the "toge")
SCALUDLOCOROCO
turns on scaling.
While placing objects, HOLD Select and use up / down on DPAD to scale objects. Not all objects scale and a few do visually but don't work (e.g. toge)
Note: this is one place were I probably disagreed with the director. The director pulled that feature because he didn't feel like explaining it to the user. He thought it would make the editor more confusing. Maybe he was right.
The next set of codes let you *cheat*. I guess technically so do some
of the ones above but I'd argue those ones let you have fun, the following
ones though, well, it's up to you if you want to use them. These ones are
entered from the World Map. You MUST select a level so you are on the
"Start? Yes / No" message.
Again, while HOLDING L+R the codes are
SLACRLOCOROCO
opens all stages
STARSLOCOROCO
gives you 10000 coins (so you can play the mini games)
ALLCOLORSLOCOROCO
gives you all the muimui
This will remove all muimui from all levels, since they will have all already been collected, but it will also open all the mini games, let you select all 6 colors of locoroco, and let you select all music in the Loco House and Loco Editor.
I suggest you use a different game save if you enter these codes.
Disclaimer: This page as absolutely NOTHING to do with Sony. I do NOT speak for
them or represent them in any way.
In my circle of friends there is this couple, David and Elly, that are among
the biggest game fans I know. To give you an idea, together they live in a 3
bedroom house. One room, the master bedroom is just that, their bedroom. Of the
other two bedrooms, one is Elly's game room, the other is David's game
room. Each of them have personal bookshelves of collections of games, nearly
every system that has ever come out, a large TV to play their games on and
their own PCs. On top of that they have 3 arcade cabinets and a projection TV
with more game systems connected to it in their living room.
So, sometime late in 2005 David announced he had asked Elly to marry him and
she said yes. The wedding was to be in April 2006. Our group has had a little
bit of a history of, um...., interesting birthday presents and so we got this idea that it would be really cool to surprise David and
Elly with their very own video game on their wedding day. Something that could
be presented at their wedding reception.
A group of about 11 of us met one day in December to discuss ideas for games.
Should we make a small adventure game? Should it be multi−player so they
could both play at the same time? Maybe it should just be a side scrolling
shooter or a simple platform game. Ultimately we decided on making a bunch of
simple mini games in the spirit of Wario Ware.
We brainstormed a bunch of simple game ideas including many raunchy ones that
we thought maybe we'd have to save for a special party without the
relatives although in the end we made just one version with relatively safe
themes.
We talked about which platform to make the game on. PSP was discussed but a PSP
game can't be shown to a crowd easily. My first thought was that it should
be a PC game because that's the easiest system to develop for. The problem
though with PCs is they are all different so making a game that runs on my home
PC doesn't mean that same game is going to run well on whatever PC we
manage to be able to bring to the reception.
Ultimately I made a simple cross platform library for PC and XBox. This allowed
me to create and test the game on the PC but it meant at the actual reception
all we would need was an XBox and since they are all the same we wouldn't
have to worry about performance or driver issues.
Hot Stack was the first person to deliver graphics to me. He gave me a set of
graphics for the game "Atkins Only". Each of the pieces of food and
the background as well as heads of David and Elly. I set out to get it to work
and it turned out to be quite a chore to figure out the positioning of all the
graphics. That is what prompted me to write the script I mentioned above.
Once that was working things started to go pretty fast. McWild started giving
me graphics very quickly and it generally took about 4 hours on my part to put
together each of the 13 games.
While I was working on that McWild was busy creating an opening and closing
video. He chose the theme of Donkey Kong seeing Elly as the Princess and David as
Mario and therefore wanting to stop the wedding. That prompted me to make the
title screen and progress screen to be Donkey Kong based. David and Elly would
alternate playing mini games. Each time they completed one their character
would move up the Donkey Kong level removing a peg until all the pegs were
removed and Donkey Kong would fall on his head letting them get married.
About 70% into creation we found out we would not be able to show the game at
the reception. We paniced having put so much work in already. Of course we
couldn't tell David and Elly what we were creating but we had tried to
arrange getting a projection TV setup at the reception and found out it was
basically impossible. Fortunately in Japanese culture it is common to have an
after party or nijikai (second party) after the reception which is generally
for friends v.s. the reception which is for family.
We talked to Elly's Uncle who was arranging the reception and visited the
place. It was prefect with a large room and a large projection TV on one wall
as well as connectors we could use to setup the XBox.
Even better, McWild, who is an amazing photographer and video editor was asked
directly by David and Elly to make something for the after party. This gave him
permission to go take a bunch of pictures and footage of them without them
knowing that we were going to use it for the game.
On the day of the wedding, David and Elly assumed we were going to show a video
and since the game started with a video they had no idea it would end on the
title screen of their very own custom game. McWild also had 2 wireless
controllers which made it perfect for them to be able to stand in front of the
big screen and play. According to sources, Elly didn't cry at her wedding
but she did cry when she saw the game. Apparently she was overwhelmed that we
had put so much effort into it.
Here then is a short version of some of the game being played at the after
party.
To be honest we were a little worried. Games are not everyone's thing and
we wondering if some of the other friends or family would be bored but to our
amazement and delight, everyone was super into it. They cheered on Elly and
David as they played and generally couldn't stop talking about it even
after it was over. 大成功!
As for the individual games, some games were meant for David to play, others
for Elly and a few for both.<h3>Atkins Only: (both)
This is a kind of like the opposite of Root Beer Tapper. Food comes out the doors on the right and slides down the counters to the
left. David or Elly must eat all the Atkins food and avoid the non Atkins food.
Both David and Elly were on the Atkins diet for a while.
Balance: (David only)
In real life David has 3 Xboxes (Elly has 2) so we though a game with him in
Akihabara balancing 3 Xboxes was kind of funny. Basically the game nudges the
boxes a little so you have to get past them on the opposite side of the way
they are leaning to get them to lean the other way. It's not that intuitive
and required quite a bit of balancing.
Bring It In / Make it Fit: (David only)
As I mentioned, David and Elly have 3 generic arcade cabinets in their living
room. The original idea for this game was that the door would stay still and
David, pulling in an arcade cabinet, would scale up from the back and he'd
have to make it into the door with almost the same controls as the Balance
game. I tried that first and it was incredibly boring.
The next try was instead to have David and the machine be a fixed size and have
him have to bring the machine in through receding doors. This gave it a much
more dynamic feel and made it much better.
Distract Elly: (David Only)
As I mentioned, Elly's a gamer and if fact she is arguably more of a gamer
than David so we came up with a simple game where it's David's job to
distract Elly from playing a game and get her to notice him.
The actual mechanics of the game are simple. David just has to press the A or B
buttons as fast as he can and get the meter up to the goal before his time runs
out. In the meantime we see him on the screen jumping around in front of Elly
in a Hard Gay suit trying to distract her.
Some highlights: if he gets the meter 80% of the way to the top Elly will
lookup from her game playing and the alert guard sound from MGS plays. If David
fails to get the meter up in time then Elly's says "つまらない。。。"
which means booooring...
One interesting thing is the game basically works by each time the button is
pressed a certain amount is added to the meter were as each frame of the game a
certain amount is subtracted. Both of those values are constant meaning
it's no harder to play at the beginning than the end but the rise in
tension of the music as well as the time running out make it seem like it's
really getting harder each moment it continues.
No Kusoge: (Both)
Kusoge is best translated as "Shitty Game". The basic idea was that 3
games appear. Two games are Kosuge, one game is a gem. The player has just a
moment to grab the good game or else some other game otaku gets his paws on it
and it's gone.
Unfortunately this was a hard game to understand. If you give the player too
much time it's way too easy. At the same time if you give them too little
time it's not enough for them to figure out which game is good. On top of
that, without knowing how to play the game before they start it is nearly
impossible to figure out as you only have about 1.5 seconds to choose.
Pick the Straight Guy: (Both)
This was a joke game. The faces of several members of our group were shown
composited over a gay bar scene from South Park and David or Elly, who's
ever turn it was had to try to pick the straight guy. Of course it turns out in
the end none of them are straight and
"P−O−W−N−D" is printed over the screen. As an
added bonus the music for this game is the theme song from Queer Eye for the Straight Guy
Pour the Sour: (Both)
This one also just barely worked. The idea was that you need to fill the glass
by moving it under the drink dispenser and filling it neither too full nor too
empty. It basically only worked because the first time either David or Elly
played they didn't know what to do. The second time they generally got it
right
You had to press to the right to put the glass under the tap nearly immediately
in order to have enough time to fill it but pull it out about 1/2 a second
before the time ran out in order not to over fill it.
Protect the Sausage: (David Only)
We have BBQ parties often and in this game David uses a spatula to fend off
people trying to grab the sausages. It gets faster and faster as the timer runs
down and if there are no sausages left by the end he loses.
The biggest problem with this game was with with spatula's irregular shape
as well as the irregular shapes of the friends' images it is hard to tell
what a hit is. We compensated by making the hit areas large and it seemed to be
playable.
Put the Ring On: (Both together)
This is the last game, after they have defeated Donkey Kong. All they have to
do is line up the two hands, they each control one, so that when the timer runs
out the hands will automatically go together and the ring will be on.
This was also the last game made and so it was a little too easy. All they had
to do was either press both controllers all the way to the top or all the way
to the bottom. A possibly slightly better solution would have been to offset
the ranges of both sides so they would have had to try just a little harder.
It's the only game they didn't fail once to see the failure display.
Spank Cormac's Age: (David Only)
While looking for images to use in the game McWild found two pictures of David
spanking Cormacaroni. He thought we had to put those in so this was a simple
game where every press of the button spanks once and the age count goes up.
What makes the game difficult is of course one, if you don't know the
correct age but more than that in order to actually get it to his age by the
time the timer runs out, 35 at the time, you have to press pretty dang fast but
you also have to be careful not to go over.
Squash The Roach: (Elly Only)
We often gather at a certain bar in Japan and Elly used to participate. That
is, until one day when she saw a roach in the bar. She's never came back
because she hates roaches so much and that was 3 years ago so we decided we had
to make a roach squishing game.
You use the controller to move a crosshair then press the button to make a foot
come down. What makes this game particularly hard is it takes moment for the
foot to come down during which time the roach will have moved.
T-Bag: (Elly Only)
Elly is an expert Halo player and in Halo one of the things you do when you
kill someone is stand over them and press the duck button to T−Bag them.
This game plays the same as the Distract Elly game above. You just have to
press the buttons as fast as you can to get the meter up while in the
background you see one Halo player t−bagging the other faster and faster
while he yells out some smack talk.
Whac-A-Taru: (Elly Only)
Elly is or was addicted to Final Fantasy XI so we made this simple game where
you press the D−Pad in the direction you want to whack. Miss one and
it's game over.
In the end I think I only spent about 80 hours total making this over the
course of about 3 months. I believe McWild also spent about 80 hours making
graphics and the video.
Some things that helped make this easier
We made a base file that had layers to show the "title safe area"
(the area that is guaranteed not to be cut off by they edges of the TV. It also
had the timer bar so the person making the graphics could see that things were
not going to be covered up by it.
Of course we borrowed lots of music, graphics and sound effects. We're not
sure what the law is there. The game was basically only shown at a wedding
except for the excerpts above on Youtube. We hope the respective copyright
owners will not be upset with us.
That also means we can't make it available for others to play but
that's okay since most of the games feature inside jokes that only people
in our group would get.
A big issue was that we needed each game to be hard enough that they failed
once and easy enough that they made it through on the second try. The reason is
each and every game had a special win and lose sequence usually with some kind
of joke or embarrassing picture involved so we wanted them to see the fail
screens as well as the win screens but we didn't want them to fail a bunch
of times as it would get boring quickly for those watching.
In one case, the Squash the Roach game, I even went so far as to make the game
too hard to start and then much easier the second time through just to try to
force the issue. I actually found the game kind of fun on its initial harder
setting but even then I could only win it about 1 out of 4 times and we knew
Elly, with no chance to practice would end up taking longer.
In the end it was a great experience. I setup an FTP site so we everyone could
upload their assets and download the latest version of the game. The PC version
made it possible to work fast. I used a controller adaptor to let me use
console controllers on the PC. That way it was easy to test and debug the all
the 2 player stuff as well as the loading screens and other issues that needed
to be ironed out. Modern systems have made it incredibly easy to throw together
something like this without having to worry about optimizing code or memory
issues like we had to in the past.
For the last few years I've helped organize a relatively large party here in
Tokyo every Summer. This last summer 230 people came. We need to send
e−mail to all the people we invite and you'd be surprised how hard it
actually is to send email to that many people.
Some of the issues are:
If we send with lots of people in the to:, cc: or bcc: fields many email servers will assume the mail is spam and reject it
MS Excel with MS Word and MS Outlook are supposed to allow you to send form letters as email. The option is still in Word. You pick Mail Merge and select an Excel file with all your data, create a form letter and Word will generate a separate mail for each person listed in your Excel file through Outlook. Unfortunately the ability of Outlook to be able to do this was abused by viruses and that feature was disabled off.
Even if we sent from Outlook or pretty much any other software that we could use for form email we ran into problems with Encodings. Half the people we invite are Japanese and must receive email in Japanese. You'd think maybe you could use Unicode (UTF-8) but not everyone is running a modern e-mail client.
Some people are on old cell phones. Some are even stuck using Netscape 4.7 at their office. Send the wrong encoding and they just get a message full of garbage or mojibake as it's called in Japanese.
The first 2 problems meant we couldn't just use Outlook and the last problem
also seemed an issue no mater what software we tried.
The solution I tried was to write my own perl script to send the mail but there
were oodles of problems.
The most common way I've seen sending email in perl is to pipe directly to sendmail. Unfortunately that means your perl has to be running on a server with sendmail setup.
Even if you sent up sendmail many servers will reject your mail if it's not from the same server as the account you're sending from. In other words if the from address is ourparty@yahoo.com the server sending the mail better be on the yahoo.com domain otherwise it will get rejected by many servers as spam.
To deal with the previous problem you need to send through smtp using an external server (like Yahoo for example). Most mail servers require authentication but most examples I could find online for sending smtp email through perl didn't show how to talk to a smtp server that requires authentication.
Once you get the mail sending you next have to deal with the encoding issues. Subject lines that are not in English as well as Japanese contents need special encodings. No where does this seem to be documented well, at least not in English.
So, after 3 years of using this script and running into issues and fixing those
issues I think it finally works. It uses smtp which avoids the first problem.
It authenticates smtp (username/password) so it fixes the second problem. And,
finally, after much trial and error it appears to use a format that works all
the time (jis / iso−2022−jp)
I doubt many people need something like this but if you do hopefully google
brought you here and I managed to save you a few headaches
#!/usr/bin/perl
#
# This program sends an email in Japanese through an SMTP server
# that requires authentication.  Hopefully it does it in
# a way that no recipient will have problems receiving
# correctly. (ie, no mojibake)
#
# The subject is hard coded below
# The body is read from the file "msg-ja.txt"
#
# Both the subject and the file msg-ja.txt are expected to be in shift-jis format
# which is the default format for Windows text in Japanese mode. In other words
# if you are running Japanese Windows XP or English XP with your
# "Language for non-unicode programs" set to "Japanese" then notepad by default
# will save text in shift-jis and you can use that Japanese here
#
use warnings;
use strict;
use MIME::Lite;
use Email::Send;
use Encode;
use Encode::JP;
use JCode;

myaccountInfo = {
    'smtp'        => 'smtp.yahoo.com',
    'username'    => 'myaccount@yahoo.com',
    'password'    => 'mypassword',
    'fromaddress' => 'myaccount@yahoo.com',
};

mymailData = {
     'subject'   => Jcode->new("????????????", 'sjis')->mime_encode,
     'body'      => encode('iso-2022-jp', decode('shiftjis', read_file("msg-ja.txt"))),
     'type'      => "text/plain; charset=\"iso-2022-jp\"",
     'encoding'  => "7bit",
     'toaddress' =>'match@greggman.com',
};

myresult = send_mail(accountInfo, mailData);
print"result = result\n";

sub send_mail
{
    my(accountInfo, mailData) = @_;

    mysubject  = mailData->{'subject'};
    mybody     = mailData->{'body'};
    mytype     = mailData->{'type'};

    mymsg = MIME::Lite->new(
                From        => accountInfo->{'fromaddress'},
                To          => mailData->{'toaddress'},
                Subject     => mailData->{'subject'},
                Type        => mailData->{'type'},
                Encoding    => mailData->{'encoding'},
                Data        => mailData->{'body'},
               );

    mymsgstr = msg->as_string();
    myresult = send SMTP::Auth => msgstr,
                      accountInfo->{'smtp'},
                      accountInfo->{'username'},
                      accountInfo->{'password'};
    returnresult;
}

sub read_file
{
    myfilename = _[0];
    mydata = "";

    myresult = open(CONTENT, filename);
    if(! result)
    {
       die("*** ERROR: can't open filename: !");
    }
    else
    {
       local(/) = undef;
       data = <CONTENT>;

       close(CONTENT);
    }

    return(data);
}
On thing to be aware of. As it says the above code is expected to be saved in
shift−jis format. Unfortnately unless you know what you are doing if you
just cut and paste the source above there's a possibility it won't get pasted
in shift−jis. If you are running Window XP with your "Language for
non−Unicode programs" set to Japanese then you can copy and paste into
Notepad and then when you save choose the "ANSI" Encoding. That appears to work.
Note: from and to lines will also need special encoding if your are putting
more than just the address in. For example if instead of "keiko_suzuki@foobar.com" you are using something like "鈴木恵子<keiko_suzuki@foobar.com>" then you're going to need to encode those as well. I just settled for leaving
those as the email address only to save frustration.
I was working on some home project the other day and I needed some images for a
simple 2d game. Once I had made all the graphics in Photoshop I had to save
each one to a separate file, then flatten each of those files, copy and paste
each one back in to the original, then align the flattened copy with its
corresponding part in the original and then look in the info palette and write
down its coordinates. Just 10 images ended up taking 45 mins.
I thought there had to be a better way. Photoshop has had the ability to be
scripted externally for a while now but it only actually got truly useful as of
version 8.0 or Photoshop CS. I looked into it and the result is this script
that will automatically cut out all my images and save the relevant information
to a file ready for use in a game.
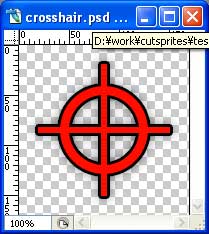
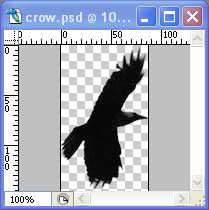
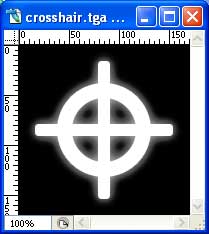
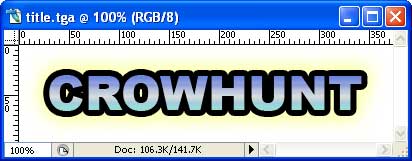
Imagine you are going to make a simple 2d game called Crowhunt. You need the
following graphics. A crow, a feather, a crosshair, a hand + gun, the title
graphics and a background image.
The script I wrote works by going down the first level of layers and groups in
Photoshop and turning each one into a separate file cropped to the size of that
layer.
It saves the images by the name of that layer or group.
One other feature I needed was the ability to mark a particular spot in an
image as a reference point, usually as a rotation point. Before I would put the
Photoshop cursor over that point, look at the info palette and write it down
but again, that was a pain in the ass so instead I now create a group, name the
group what I want the result saved as, put the layer with the image I want
inside the group and then create a new layer inside that group with the name
"rotpoint". In that layer I put a single pixel using the pencil tool,
any color. The script will save the location of that pixel for me. You can see
to the left in my example layer palette the handgun group has a
"rotpoint" layer and if you look closely above you can see the 1
pixel yellow dot in the sleeve of the arm. That pixel will not appear in the
final file, it just marks the rotation spot.
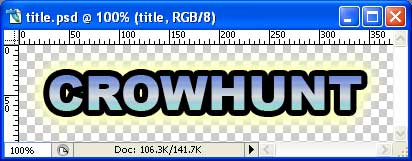
I also did not want to have to flatten anything and I wanted to be able to use
Photoshop's layer effects. If you are a Photoshop user you might notice on
the layers on the left the crosshair is a vector based layer and the title is a
text based layer and the both have layer effects applied. The script will keep
them as you see them there.
Once it's done I save the Photoshop file and run the script. When it's
done I'll have one Photoshop file for each layer or group I had in the
original, trimmed to its minimum size.
Here are the images as cut from the sample above
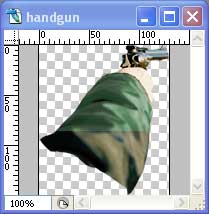
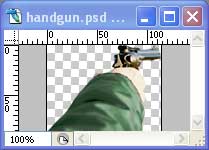
The first thing to notice is the handgun has more graphics than it appeared to
originally. When you paste something into a layer in Photoshop, Photoshop by
default keeps all of it. Later you might decide to move that layer and if you
dragged it further into the image you'd be glad that's the way it
works. In my case though I just wanted exactly what was on the screen so I did
a "Select−>All" and an "Image−>Crop".
Because I had all selected it doesn't appear the crop did anything but it
actually cropped the stuff from any layer that had parts outside the image. I
ran the script again and this time the handgun came out as I needed it.
The values in the macros are as follows. The first number is an index if
you want one, followed by an ID and then a filename. The next 4 values are the
bounds of the rotpoint or the bounds of the image if no rotpoint existed. The
second set are the bounds of the image. The format of those are left, top,
right, bottom where right and bottom are 1 pixel off the right and bottom. In
other words, the width of an image is (right − left) not (right −
left + 1).
To use that info in a game in C++ you might do something like this
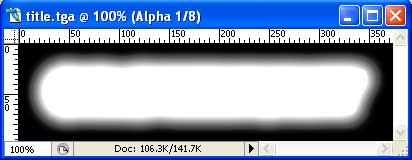
Unfortunately, I know very few engines that can directly load Photoshop files.
For my purposes I needed targa (.TGA) files. While it *should* be
possible to get Photoshop to save targas the problem is I wanted alpha channels
as well and I wanted them to have alpha that included the layer effects from
Photoshop.
That's not trivial in Photoshop. The steps are something like:
create a new empty layer
merge the visible layers. This will remove the effects and bake them into the image.
select the transparency of the layer
set the background color to black and the foreground color to white
go to the channel palette and create a new channel
fill the selection with white
You'd now have the correct alpha. Unfortunately those steps are not easily
accessible from scripting in Photoshop. While it would be possible, under the
current script engine it requires using actions. I tried it once, Photoshop
comes with a "ScriptListener" which will save all everything you do
in Photoshop to a script which you can then edit later. I tried it but it was
not easy to understand and as I already had a different solution that worked I
decided to use that instead.
My different solution is a tool that is part of the libraries I use for games development written back in 1995 that will load Photoshop
files and save them as targas (among other things). Photoshop by default saves
a preview image inside its files that is the result off all the layers together
as well as the transparency so converting that to a targa through my old tools
gives me exactly what I need.
Here you can see the result. You can see the glow around the title and the
shadow and border around the crosshair as well as the correct alpha for each of
them.
To use the Photoshop cutsprite script manually you'll need at least
Photoshop CS. Make a Photoshop file following the rules described above with
each image in a layer or group and give a name to each layer or group. Save it.
Then, Pick File−>Scripts−>Browse... from the menus and choose openandcutsprites.jsx. An open file dialog will appear. Select the file you saved. The script will
then follow these steps
load the file
separate each layer and group to a new file and save it to the same folder as the original based on the name of the layer or group.
write out a <filename>.info.cpp file with in info about the sizes of the images.
close the original image.
Warning: There is NO check for overwriting files so be careful!
I also wrote a script that will go through a tree of folders finding any
Photoshop file that begins with "cut_" and will cut that file
automatically. To run that you'll need to install ActivePerl (free). I could have written the script in VBScript or JScript but
I'm far more comfortable with Perl so I did it there. Perl supports
Microsoft's "Windows Scripting Host" which is basically a way for any language to be used as a scripting
language for Windows. Microsoft supplies VBScript and JScript. There is also
PerlScript and PythonScript.
The script will start from the current folder and look in every subfolder for
any file that starts with "cut_" and ends in ".psd".
If it sees such a file it will tell Photoshop to run the script above on that
file. The easiest way to use it is just to copy it and the rest of the files to
the base folder of whatever project you are working on. Double click on cutallsprites.wsf and it should run. Oh, before you do that you should open a command line and
type
cscript //H:CScript
capitalization is important! This will set Windows Script Host to default to
using the command line version.
Also included is another Perl program called processPSDtoTGA.pl. This program
will walk all the folders from the current folder down and any ".PSD"
file it finds it will create a corresponding ".TGA" file. Like the
previous tool it's easiest if you just copy this and all the other files to
the base folder of your current project and double click it to run it.
I hope you find this useful. The code is released under a BSD license so feel
free to modify any of these to suit your own needs. You can download it from
the link below
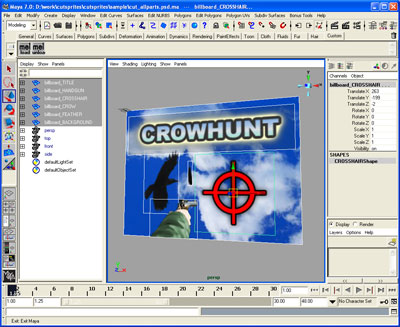
I added a Maya Ascii scene file generator to the cutallsprites.wsf script so once the Photoshop file has been cut you'll find a ".ma" maya ascii
file there. Load it up in Maya and it should reproduce the original setup along
with points of origin in the correct spots.
Often many 3d engines have limited 2d abilities. They'll have a full on
animated textures, materials, translation, rotation and scale for 3d but
nothing for 2d. Well, just setup an orthographic camera and use your 3d engine
for your 2d. Much simpler than writing a completely new system.
Version History:
1.4 - 2006/03/15
Added "ig_" ignore layer support. Layers that start with the letters "ig_" will be ignored. This is especially useful for layers with guides or safezones or other things
Changed code to turn on all layers that are not one of the various special layers (ie, "ig_..", "cropsize", "bg_color", "rotpoint", etc.)
The point is many times artists and myself turn off layers to do work but forget to turn them back on before saving in which case these scripts will fail. I could have made it skip layers that are turned off but in my experience it's far more common that you want all the layers. If there is a layer you don't want rename it to "ig_...".
Changed cutallsprites.wsf to check data of maya file vs photoshop file. If the maya file is newer than I assume the file does not have to be re-cut and I can skip it. This means re-running cutallsprites.wsf will be fast and efficient and do nothing if nothing needs to be done or only cut those files that have been updated.
1.3 - 2006/03/10
Added "bg_color" layer support. Layers with the name "bg_color" will be turned on if they exist. You can put them inside groups to make them apply to only one group and you can have more than 1.
What's the point?
Well, for many 3D hardware if you want to display a colored texture with transparency you basically need to draw in full color in the color layer and just set the alpha for transparency. In other words, lets say you wanted to have the word "Start" in red. If you just draw it in red with no "bg_color" layer you will get a texture with red pixels on a white background and the correct alpha channel
. The problem is the pixels that are anti-aliased at the edges already have white mixed in them. If you use this on some 3D hardware your word will have a slighty white border. To fix this create a layer, name it "bg_color" and fill it with red. Since it's probably confusing hide the layer. Now run the script and you'll get a completely red texture but with the correct alpha. This will look correct on hardware that had issue with the previous texture. See the included sample "cut_bgexample.psd".
Added support for global "cropsize" layers. Now you can put multiple layers and crop them all to the same size. See the included sample "cut_bgexample.psd".
Added forcing to a even number of pixels. This should probably be an option since your tools might not have an even pixel limit but 1 extra pixels is not going to bother most people so I decided not to add an option. If you don't like it edit the code.
1.2 - 2006/03/04
Added maya ascii scene generator
Moved targa generation to photoshop script
Added black blending / premult for alpha if targa
1.1 - 2006/02/17
Similar to the "rotpoint" layer, added a check for "cropsize" inside a group. If found the group will be cropped to the size of the "cropsize" layer.
I've been looking for a simple expression guide for a while. I
actually checked quite a few drawing books but couldn't find what I was
looking for. Specifically since I came to Japan I noticed they seem to have a
very set way to draw simple happy face style expressions and I wanted a couple
of pages with examples. My guess is that Japanese kids are all taught
from the same books in school so a lot of them end up drawing the same types of
simple characters. I don't mean to suggest the Japanese are not creative,
only that many of them must have studied the same happy faces since they are so
common
Anyway, I never did find a Japanese book with a list of the different faces but
then I found the Ed Emberley books and he had a great page with lots of very simple faces. Looking at it it
was pretty clear there was pattern, 3 types of eyes, 4 mouths, 3 eyebrows and
every combination of those make quite a few expressions.
Here's my interpretation so now I have my reference.
Of course that's not every possible face but it's surprising how many
expressions those 10 parts cover. Here's a few they don't.
Apply your own interpretations of what they each express but please be nice 😊
Now if someone could point me to a stick figure action pose guide!
Excel, at least as of version 2002, will save directly to XML. When you pick
save just choose the xml format. From that point on, you can edit that XML file
directly in Excel and when you re−save Excel will continue to save it as
XML. The point is, you should almost NEVER EVER use xls files EVER
because XLS files are not usable by anything but Excel. Since XML files
are usable by both Excel and other software you'll only confuse yourself
and others if you keep using xls files. In fact, as of Office 2003
Windows will open Excel created XML files in Excel by default. Even
better.
Here's some perl to parse an Excel XML file.
#
use strict;
use warnings;

use XML::Simple;
use Data::Dumper;
use Encode;

my inFilename  = ARGV[0];
my outFilename = ARGV[1];
if (!defined(inFilename) || !defined(outFilename))
{
   die ("usage: xlReader.pl infilename outfilename [encoding]\n");
}

my g_encoding = ARGV[2];
if (!defined(g_encoding))
{
   g_encoding = "utf8";
}

my xml = XMLin(inFilename,
   ForceArray => 1
   );

my xl = { };

# build hash of rows indexed by rowNumber
# of hash of cells indexed by columnNumber
my lastRow    = 0;  # remember the bottom most row we find
my lastColumn = 0;  # remember the right most column we find
{
   my currentRow = 0;

   my rows = xml->{'Worksheet'}->[0]->{'Table'}->[0]->{'Row'};

   foreach my row (@{rows})
   {
      # figure out the row's index
      my rowIndex = currentRow + 1;
      if (defined (row->{'ss:Index'}))
      {
         rowIndex = row->{'ss:Index'};
      }

      # track last row
      if (rowIndex > lastRow) { lastRow = rowIndex; }

      # assert if we already have this row
      if (defined (xl->{rowIndex}))
      {
        die ("row rowIndex already defined!\n");
      }

      # make a new empty hash for this row
      xl->{rowIndex} = { };

      my rowHash = xl->{rowIndex};
      my currentCol = 0;
      my cells = row->{'Cell'};
      foreach my cell (@{cells})
      {
         # figure out the column index
         my colIndex = currentCol + 1;
         if (defined (cell->{'ss:Index'}))
         {
            colIndex = cell->{'ss:Index'}
         }

         # assert if we already have this column in this row
         if (defined(rowHash->{colIndex}))
         {
            die "column colIndex in row rowIndex already defined!\n";
         }

         # add the cell here
         if (defined (cell->{'Data'}))
         {
            rowHash->{colIndex} = cell->{'Data'}->[0];

            # track lastCol
            if (colIndex > lastColumn) { lastColumn = colIndex; }
         }

         currentCol = colIndex;

         # if a cell is used across multiple cells
         # copy the contents to all cells it covers
         if (defined(cell->{'ss:MergeAcross'}))
         {
            currentCol += cell->{'ss:MergeAcross'};
            if (defined (cell->{'Data'}))
            {
               for (my ii = 1; ii <= cell->{'ss:MergeAcross'}; ii++)
               {
                  rowHash->{colIndex + ii} = cell->{'Data'}->[0];
               }
            }
         }
      }

      currentRow = rowIndex;
   }
}

#print Dumper (xl);

# at this point we have a hash of rows of columns so we can access any cell
# in the spreadsheet by calling GetCellValue(xl, row, col);
# GetCellValue may return undef if that cell does not exist
# You can also call GetCellValueCheck which will fail if the cell does not
# exist
#
# In the following example we will generate a text file in the following these rules
# 1) Row 1 is used to mark the start ( s ) and end ( e ) of what you want converted
#    You can also designate a label column ( l ). If they are same columns you can
#    specify them with a comma as in "s,l"
# 2) Row 2 is a description
# 3) Row 3 is the field name, if it is only 1 or 2 characters the description (row 1)
#    will be prefixed
# 4) Row 4 is the default row. Any value not appearing below will default to the
#    value in row 4
# 5) Actual data stars in row 5
#
#

my FILE = IO::Handle->new();
my startColumn;
my endColumn;
my labelColumn;

# find start, end and label columns
for (my colIndex = 1; colIndex < 300; colIndex++)
{
   my value = GetCellValue(xl, 1, colIndex);
   if (defined(value))
   {
#      print "value=(value)\n";
      if (value =~ /(?:^|,)e(?:,|)/i)
      {
         endColumn = colIndex;
         last;
      }
      if (value =~ /(?:^|,)s(?:,|)/i)
      {
         startColumn = colIndex;
      }
      if (value =~ /(?:^|,)l(?:,|)/i)
      {
         labelColumn = colIndex;
      }
   }
}

if (!defined(startColumn)) { die ("could not find start column\n"); }
if (!defined(endColumn)) { die ("could not find end column\n"); }

open (FILE, ">" . outFilename) || die ("could not open file outFilename\n");

# build stage data
for (my rowIndex = 5; rowIndex <= lastRow; rowIndex++)
{
   print FILE "#-------------------------------------------------------\n";
   if (defined(labelColumn))
   {
      my label = GetCellValueCheck(xl, rowIndex, labelColumn);
      print FILE "label = ", perl2output(label), "\n";
   }

   for (my colIndex = startColumn; colIndex <= endColumn; colIndex++)
   {
      # for each column:
      # grab description in row 2
      # grab label in row 3
      # grab default from row 4
      # use default if value does not exist
      my description = GetCellValue(xl, 2, colIndex);
      my columnLabel = GetCellValueCheck(xl, 3, colIndex);
      my default     = GetCellValueCheck(xl, 4, colIndex);

      my value = GetCellValue(xl, rowIndex, colIndex);

      if (!defined(value)) { value = default; }

      # --- if the column label is too short add the cell above it
      if (length(columnLabel) < 3)
      {
         columnLabel = description . columnLabel;
      }

      # --- exceptions ---
      if (!defined (description)) { description = "-???-"; }

      print FILE perl2output(columnLabel), " = ", value,
        " # ", perl2output(description), "\n";
   }

   print FILE "\n";
}

close FILE;
exit 0;

sub GetCellValueCheck
{
   my (xl, row, col) = @_;

   my value = GetCellValue(xl, row, col);
   if (!defined (value))
   {
      die "required cell " . ToExcelColumn(col) . "row not defined!\n";
   }

   return value;
}

sub GetCellValue
{
   my (xl, row, col) = @_;

   if (defined(xl->{row}) && defined(xl->{row}->{col}))
   {
      return xl->{row}->{col}->{'content'};
   }

   return undef;
}

sub ToExcelColumn
{
   my (col) = @_;

   if (col <= 26) { return chr(col+64); }

   return chr((col - 1 / 26) + 65) . chr(((col - 1) % 26) + 65);
}

sub FromExcelColumn
{
   my (col) = @_;

   my colNdx = 0;
   for (my cc = 0; cc < length(col); cc++)
   {
      colNdx = colNdx * 26 + ord(uc(substr(col,cc,1))) - 65;
   }

   return colNdx + 1;
}

sub perl2output
{
   my (str) = @_;

   return encode(g_encoding, str);
}
Just as an example, given a spreadsheet that looks like this
l
s
e
?
?
?
Color
Name
Hitpoints
Icon
R
G
B
default
label
1
wimpy
255
255
255
ogre
10
wimpy
200
150
10
orc
15
wimpy
207
160
15
dragon
200
strong
?
200
123
beholder
150
strong
?
50
12
snake
5
?
?
?
?
The perl above will produce this file
#-------------------------------------------------------
label = label
Hitpoints = 1 # -???-
Icon = wimpy # -???-
ColorR = 255 # Color
ColorG = 255 # Color
ColorB = 255 # Color

#-------------------------------------------------------
label = ogre
Hitpoints = 10 # -???-
Icon = wimpy # -???-
ColorR = 200 # Color
ColorG = 150 # Color
ColorB = 10 # Color

#-------------------------------------------------------
label = orc
Hitpoints = 15 # -???-
Icon = wimpy # -???-
ColorR = 207 # Color
ColorG = 160 # Color
ColorB = 15 # Color

#-------------------------------------------------------
label = dragon
Hitpoints = 200 # -???-
Icon = strong # -???-
ColorR = 255 # Color
ColorG = 200 # Color
ColorB = 123 # Color

#-------------------------------------------------------
label = beholder
Hitpoints = 150 # -???-
Icon = strong # -???-
ColorR = 255 # Color
ColorG = 50 # Color
ColorB = 12 # Color

#-------------------------------------------------------
label = snake
Hitpoints = 5 # -???-
Icon = wimpy # -???-
ColorR = 255 # Color
ColorG = 255 # Color
ColorB = 255 # Color
Here's a small idea that you might find useful for your C++ code. I learned
this while working at Sega of Japan.
In a lot of programming and especially in games we need lots of tables. Of the
those tables need to have constants to access them or there may be parallel
tables that need to stay in sync. Having a list of constants (defines or enums)
and also having one or more tables those constants have to stay in sync with is
a real pain in the ass. On top of that almost every programmer that's used
them has run into problems where one of their tables was out of sync and it
took time, could even be hours, to track down the bug only to finally figure
out they were out of sync.
So, a solution is needed. Back in the 8 bit days we could not even do
structures so all data was stored in parallel arrays. For example all enemies
might need hit points, damage, speed etc. All that in today's world would
be stored in an array of structures but back then it was much more efficient to
store them in parallel arrays. Unfortunately, trying to find the 49th line in
each array to edit it was massively slow and error prone so I wrote a tool to
take an structure like array and break it into parallel arrays.
Once we moved to structures that problem disappeared but using constants like
PLAYER=1 and BUGEYEDMONSTER=47 and keeping those in sync with your tables was
still a problem. And, other times you'd still need more than one table and
all of it needed to stay in sync. Add something to one table and forget to
update another and crash!
For that purpose my friend John Alvarado wrote a program called definer. It will take that kind of data and write out multiple files like a .h file
with your constants and a .cpp file with your table, even a .inc file for your
assembly language and anything else you might need as well.
That's great and it has it's place but sometimes it's overkill if
you just have a small localized problem to solve.
This trick I learned at Sega involves using a macro to define your constants
and tables and enclosing each item in the list in an undefined macro. Then,
anytime you need to you can generate a table and use the info you need. Since
there is only 1 place to edit everything (the table macro) you never have to
worry about things getting out of sync. Less work, less error prone, everybody
wins.
To give you an example, here's some sample code you might see in a game to
startup the various characters in a game. Somewhere you would have or load an
array of data that lists the types of objects you need to appear and where they
appear and then you'd walk the list and generate all the objects maybe
something like this:
/* ================ normal ========================== */
#include "limits.h"
struct VECTOR3
{
float x;
float y;
float z;
};
/**************************** enums for types ****************************/
class GameTypeID
{
public:
enum ID
{
Player,
Ogre,
Orc,
last,
force_int = INT_MAX,
};
};
/****************** one entry in a table of game object ******************/
/****************** to introduce when the level starts ******************/
struct IntroData
{
GameTypeID::ID gameType; // they type of object
VECTOR3 position; // where it starts
VECTOR3 rotation; // the way it faces
};
/************************ base class game object *************************/
class CGameObject
{
};
/******************************** Player *********************************/
class CPlayer : public CGameObject
{
};
/********************************* Ogre **********************************/
class COgre : public CGameObject
{
};
/********************************** Orc **********************************/
class COrc : public CGameObject
{
};
/*********************************** ************************************/
// some function that would take are new object and add it to our
// game system setting the object's position, orientation and other stuff
extern void AddObjectToSystem (CGameObject* pOb, IntroData* pIntro);
/******************************* InitLevel *******************************/
// takes an array of IntroData and
// starts up all the objects in that list
void InitLevel (IntroData* pData, int numObjects)
{
while (numObjects)
{
CGameObject* pNewOb = NULL;
switch (pData->gameType)
{
case GameTypeID:&#128539;layer:
pNewOb = new CPlayer;
printf ("made player\n");
break;
case GameTypeID::Ogre:
pNewOb = new COgre;
printf ("made ogre\n");
break;
case GameTypeID::Orc:
pNewOb = new COrc;
printf ("made orc\n");
break;
default:
printf ("error: unknown type\n");
break;
}
if (pNewOb)
{
AddObjectToSystem (pNewOb, pData);
}
++pData;
--numObjects;
}
}
Maybe that was a bad example since there is not much to keep in sync there
😞 But dang it, I already wrote it so we'll go with it. You can see
that every time we add a new type of GameObject we have to edit the case
statement in InitLevel() to match and we have to update the GameTypeID enum
with a new type. Also there is a case statement which might be slow (it might
have to check every case) and there is lots of redundant code (the assignment
to pNewOb and the 4 printfs)
Here's the same example using the define macro list trick
/*  ================ first attempt ==========================  */

#include "limits.h"

struct VECTOR3
{
    float x;
    float y;
    float z;
};

/***************************** list of types *****************************/

#define GAMETYPE_LIST(OP)   \
    OP(Player)              \
    OP(Ogre)                \
    OP(Orc)                 \

/**************************** enums for types ****************************/

class GameTypeID
{
public:
    enum ID
    {
        #define GAMETYPE_OP(name) name,
        GAMETYPE_LIST(GAMETYPE_OP)
        #undef GAMETYPE_OP
        last,
        force_int = INT_MAX,
    };
};

/****************** one entry in a table of game object ******************/
/******************  to introduce when the level starts ******************/

struct IntroData
{
    GameTypeID::ID  gameType;   // they type of object
    VECTOR3         position;   // where it starts
    VECTOR3         rotation;   // the way it faces
};

/************************ base class game object *************************/

class CGameObject
{
};

/******************************** Player *********************************/

class CPlayer : public CGameObject
{
};

/********************************* Ogre **********************************/

class COgre : public CGameObject
{
};

/********************************** Orc **********************************/

class COrc : public CGameObject
{
};

/***********************************  ************************************/
// some function that would take are new object and add it to our
// game system setting the object's position, orientation and other stuff

extern void AddObjectToSystem (CGameObject* pOb, IntroData* pIntro);

/******************************* InitLevel *******************************/
// takes an array of IntroData and
// starts up all the objects in that list

void InitLevel (IntroData* pData, int numObjects)
{
    while (numObjects)
    {
        CGameObject*    pNewOb = NULL;

        switch (pData->gameType)
        {
        #define GAMETYPE_OP(name)   \
                case GameTypeID::name:  \
                pNewOb = new C ## name; \
                printf ("made " #name  "\n");   \
                    break;  \

        GAMETYPE_LIST(GAMETYPE_OP)
        #undef GAMETYPE_OP
        default:
            printf ("error: unknown type\n");
            break;
        }

        if (pNewOb)
        {
            AddObjectToSystem (pNewOb, pData);
        }

        ++pData;
        --numObjects;
    }
}
As you can see we make a list called GAMETYPE_LIST and generate both the
enum and the case code. That saved us at least one place, we no longer have to
edit the case code but it's still going to be a lot of code when we get to
hundreds of objects.
Let's optimize a little. Here's what I would probably do
now−a−days
/* ================== best? ======================== */
#include "limits.h"
struct VECTOR3
{
float x;
float y;
float z;
};
/***************************** list of types *****************************/
#define GAMETYPE_LIST(OP) \
OP(Player) \
OP(Ogre) \
OP(Orc) \
/**************************** enums for types ****************************/
class GameTypeID
{
public:
enum ID
{
#define GAMETYPE_OP(name) name,
GAMETYPE_LIST(GAMETYPE_OP)
#undef GAMETYPE_OP
last,
force_int = INT_MAX,
};
};
/****************** one entry in a table of game object ******************/
/****************** to introduce when the level starts ******************/
struct IntroData
{
GameTypeID::ID gameType; // they type of object
VECTOR3 position; // where it starts
VECTOR3 rotation; // the way it faces
};
/************************ base class game object *************************/
class CGameObject
{
};
/******************************** Player *********************************/
class CPlayer : public CGameObject
{
public:
static CGameObject* create ()
{
return new CPlayer;
}
};
/********************************* Ogre **********************************/
class COgre : public CGameObject
{
public:
static CGameObject* create ()
{
return new COgre;
}
};
/********************************** Orc **********************************/
class COrc : public CGameObject
{
public:
static CGameObject* create ()
{
return new COrc;
}
};
/*********************************** ************************************/
// some function that would take are new object and add it to our
// game system setting the object's position, orientation and other stuff
extern void AddObjectToSystem (CGameObject* pOb, IntroData* pIntro);
/*************** a table of the function for making objects **************/
typedef CGameObject* (*GameObjectCreationFuncPtr)();
struct CreationData
{
GameObjectCreationFuncPtr func;
const char* typeName;
};
CreationData CreationFuncTable[] =
{
#define GAMETYPE_OP(name) { &C ## name::create, #name, },
GAMETYPE_LIST(GAMETYPE_OP)
#undef GAMETYPE_OP
};
/******************************* InitLevel *******************************/
// takes an array of IntroData and
// starts up all the objects in that list
void InitLevel (IntroData* pData, int numObjects)
{
while (numObjects)
{
if (pData->gameType >= 0 && pData->gameType < GameTypeID::last)
{
CGameObject* pNewOb = NULL;
CreationFuncTable[pData->gameType].func();
printf ("made %s\n", CreationFuncTable[pData->gameType].typeName);
AddObjectToSystem (pNewOb, pData);
}
else
{
printf ("ERROR: unknown game type\n");
}
++pData;
--numObjects;
}
}
I gave each type a static (ie, global) function to create one of itself (you
gotta do that in C++ since the internal vtable pointer for each new instance
has to be initialized. Then, I instead of using the case statement I made a
parallel array of pointers to functions to create those objects. That array is
always in sync with the enums since they are both auto generated. The code has
also gotten slightly simpler and smaller as there is only one printf now were
as there used to be one per object. Also, the function table code will be
faster and less code than a giant case statement.
That a good example and possibly where I would stop but in this particular
example we can go overboard. 😛 You can see that each of the create()
function is the same. Any type specific code could appear in that type's
constructor so using the define macro list trick we can generate those
functions as well. Here's that example.
/* ============== overkill? ============================ */
#include "limits.h"
struct VECTOR3
{
float x;
float y;
float z;
};
/***************************** list of types *****************************/
#define GAMETYPE_LIST(OP) \
OP(Player) \
OP(Ogre) \
OP(Orc) \
/**************************** enums for types ****************************/
class GameTypeID
{
public:
enum ID
{
#define GAMETYPE_OP(name) name,
GAMETYPE_LIST(GAMETYPE_OP)
#undef GAMETYPE_OP
last,
force_int = INT_MAX,
};
};
/****************** one entry in a table of game object ******************/
/****************** to introduce when the level starts ******************/
struct IntroData
{
GameTypeID::ID gameType; // they type of object
VECTOR3 position; // where it starts
VECTOR3 rotation; // the way it faces
};
/************************ base class game object *************************/
class CGameObject
{
};
/******************************** Player *********************************/
class CPlayer : public CGameObject
{
public:
static CGameObject* create ();
};
/********************************* Ogre **********************************/
class COgre : public CGameObject
{
public:
static CGameObject* create ();
};
/********************************** Orc **********************************/
class COrc : public CGameObject
{
public:
static CGameObject* create ();
};
/*********************************** ************************************/
// some function that would take are new object and add it to our
// game system setting the object's position, orientation and other stuff
extern void AddObjectToSystem (CGameObject* pOb, IntroData* pIntro);
/************************** creation functions ***************************/
#define GAMETYPE_OP(name) CGameObject* C ## name::create() { return new C ## name; }
GAMETYPE_LIST(GAMETYPE_OP)
#undef GAMETYPE_OP
/*************** a table of the function for making objects **************/
typedef CGameObject* (*GameObjectCreationFuncPtr)();
struct CreationData
{
GameObjectCreationFuncPtr func;
const char* typeName;
};
CreationData CreationFuncTable[] =
{
#define GAMETYPE_OP(name) { &C ## name::create, #name, },
GAMETYPE_LIST(GAMETYPE_OP)
#undef GAMETYPE_OP
};
/******************************* InitLevel *******************************/
// takes an array of IntroData and
// starts up all the objects in that list
void InitLevel (IntroData* pData, int numObjects)
{
while (numObjects)
{
if (pData->gameType >= 0 && pData->gameType < GameTypeID::last)
{
CGameObject* pNewOb = NULL;
CreationFuncTable[pData->gameType].func();
printf ("made %s\n", CreationFuncTable[pData->gameType].typeName);
AddObjectToSystem (pNewOb, pData);
}
else
{
printf ("ERROR: unknown game type\n");
}
++pData;
--numObjects;
}
}
Of course in that example the table was only the name of each type. If you
needed more data in your table you just added to the macro and then update your
_OP macros to match something like this
/***************************** list of types *****************************/

//     name     hp dmg, spd
#define GAMETYPE_LIST(OP)   \
    OP(Player, 100, 10, 15) \
    OP(Ogre,    50,  5, 20) \
    OP(Orc,     75,  8, 13) \

/**************************** enums for types ****************************/

class GameTypeID
{
public:
    enum ID
    {
        #define GAMETYPE_OP(name,hp,damage,speed) name,
        GAMETYPE_LIST(GAMETYPE_OP)
        #undef GAMETYPE_OP
        last,
        force_int = INT_MAX,
    };
};

/******************** a table of data for the objects ********************/

struct ObjectData
{
    GameObjectCreationFuncPtr   func;
    const char*                 typeName;
    const int                   startHitPoints;
    const int                   damage;
    const int                   speed;
};

ObjectData ObDataTable[] =
{
    #define GAMETYPE_OP(name,hp,damage,speed) \
       { &C ## name::create, #name, hp, damage, speed, },
    GAMETYPE_LIST(GAMETYPE_OP)
    #undef GAMETYPE_OP
};
And there you have it. I've found it pretty useful. Of course there are
times where I still need to use something like definer to keep things in sync
across languages or tools but for small internal stuff this works well for me.
😊
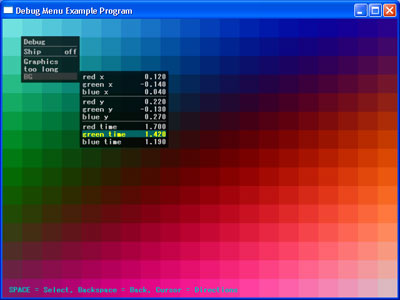
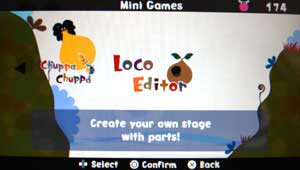
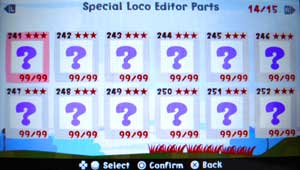
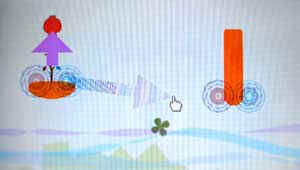
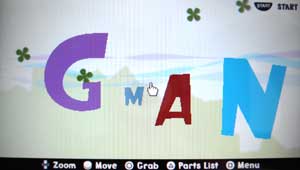
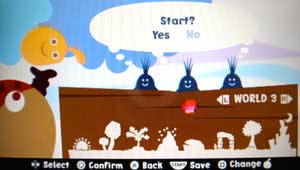
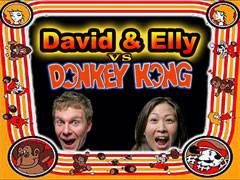
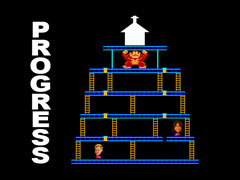 He chose the theme of Donkey Kong seeing Elly as the Princess and David as
Mario and therefore wanting to stop the wedding. That prompted me to make the
title screen and progress screen to be Donkey Kong based. David and Elly would
alternate playing mini games. Each time they completed one their character
would move up the Donkey Kong level removing a peg until all the pegs were
removed and Donkey Kong would fall on his head letting them get married.
He chose the theme of Donkey Kong seeing Elly as the Princess and David as
Mario and therefore wanting to stop the wedding. That prompted me to make the
title screen and progress screen to be Donkey Kong based. David and Elly would
alternate playing mini games. Each time they completed one their character
would move up the Donkey Kong level removing a peg until all the pegs were
removed and Donkey Kong would fall on his head letting them get married.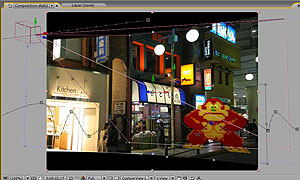 Even better, McWild, who is an amazing photographer and video editor was asked
directly by David and Elly to make something for the after party. This gave him
permission to go take a bunch of pictures and footage of them without them
knowing that we were going to use it for the game.
Even better, McWild, who is an amazing photographer and video editor was asked
directly by David and Elly to make something for the after party. This gave him
permission to go take a bunch of pictures and footage of them without them
knowing that we were going to use it for the game.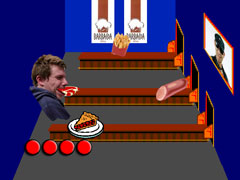
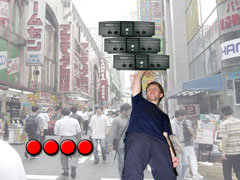

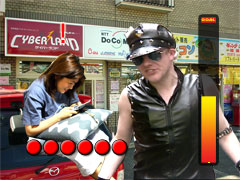
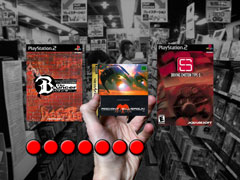
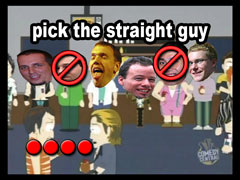
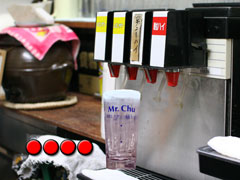
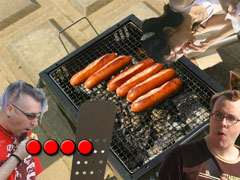
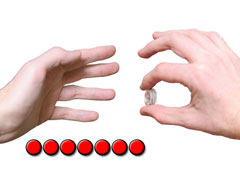
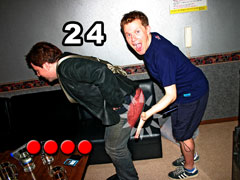
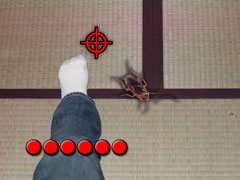
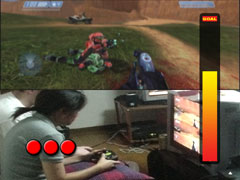

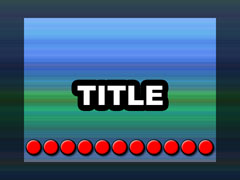 We made a base file that had layers to show the "title safe area"
(the area that is guaranteed not to be cut off by they edges of the TV. It also
had the timer bar so the person making the graphics could see that things were
not going to be covered up by it.
We made a base file that had layers to show the "title safe area"
(the area that is guaranteed not to be cut off by they edges of the TV. It also
had the timer bar so the person making the graphics could see that things were
not going to be covered up by it.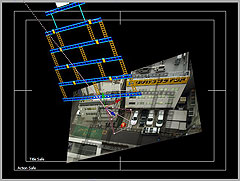 In one case, the Squash the Roach game, I even went so far as to make the game
too hard to start and then much easier the second time through just to try to
force the issue. I actually found the game kind of fun on its initial harder
setting but even then I could only win it about 1 out of 4 times and we knew
Elly, with no chance to practice would end up taking longer.
In one case, the Squash the Roach game, I even went so far as to make the game
too hard to start and then much easier the second time through just to try to
force the issue. I actually found the game kind of fun on its initial harder
setting but even then I could only win it about 1 out of 4 times and we knew
Elly, with no chance to practice would end up taking longer.